What is a Semantic Gradient?

We want them to recognize the word and be able to apply the word.
One of the things in the English language that makes this so challenging is that we have multiple synonyms for each word that we use. That is why strategies like Semantic Gradients are so important.
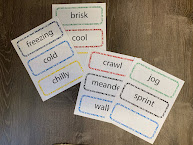
Semantic Gradients are a map of sorts showing the progression between two opposite words.
For example, words like soggy and dry may go on each of our gradient line. Students would then order wet, soaked and damp in between to show a progression. But how do we know how to teach semantic gradients?
What are the steps for this strategy?
Step One: Finding the Words
Step Two: Give the Words Meaning
This is an added step that I think is so important in an ESL classroom. Visuals are everything to our students as they progress in their understanding of vocabulary. When using a semantic gradient I like to provide a picture that they can associate with each word. So, in sticking with our example, I would show a person in completely dry clothes and a person who is soaked through, possibly from standing in the rain for too long without an umbrella. I like to talk through scenarios with my students about the words when possible as well so that they can make a real life connection.
Step Three: Arrange the Words

Step Four: Have Students Discuss
Discussion is the only thing that truly lets us know if our students “get it”. So this step in teaching semantic gradients is the most important in my opinion. Once my students feel confident in their line, we take some time to discuss as a class why they chose the order they did. Sometimes changes happen and sometimes they stick with their original choices.
To Sum It Up
enhancing Vocabulary Semantic gradients are an incredibly effective visual tool for teaching our ESL students the various synonyms of common words. There are so many ways to say the same thing so being able to differentiate the levels of words enhances vocabulary which improves both reading comprehension and writing.
Understanding how to teach semantic gradients is not a difficult task, this is a relatively simple strategy that is easy to implement. It has quickly become one of my favorites in my own classroom.
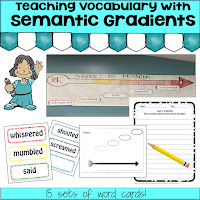
If you are ready to try using Semantic Gradients in your classroom you might be interested in our resource for TEACHING VOCABULARY WITH SEMANTIC GRADIENTS.

No comments:
Post a Comment